
We cannot neglect the fact that laptops these days are one of the most crucial part of our lives. We can compromise anything in order to keep our laptop cleaner, faster and updated. I am also a big scorer when it comes to keeping the laptop clean, healthy and upgraded. But then, there was a problem that I was tackling now and then, which made me tensed.
My laptop was making way too much noise, each time I switched it on. Usually this problem is common with all of the HP Pavilion G6 series. It kept on roaring each time when I displaced it from a certain position and it kept on making the noise until or unless it was shut down. So here are the ways for fixing the laptop noise:
Contents
Changing Fan Settings
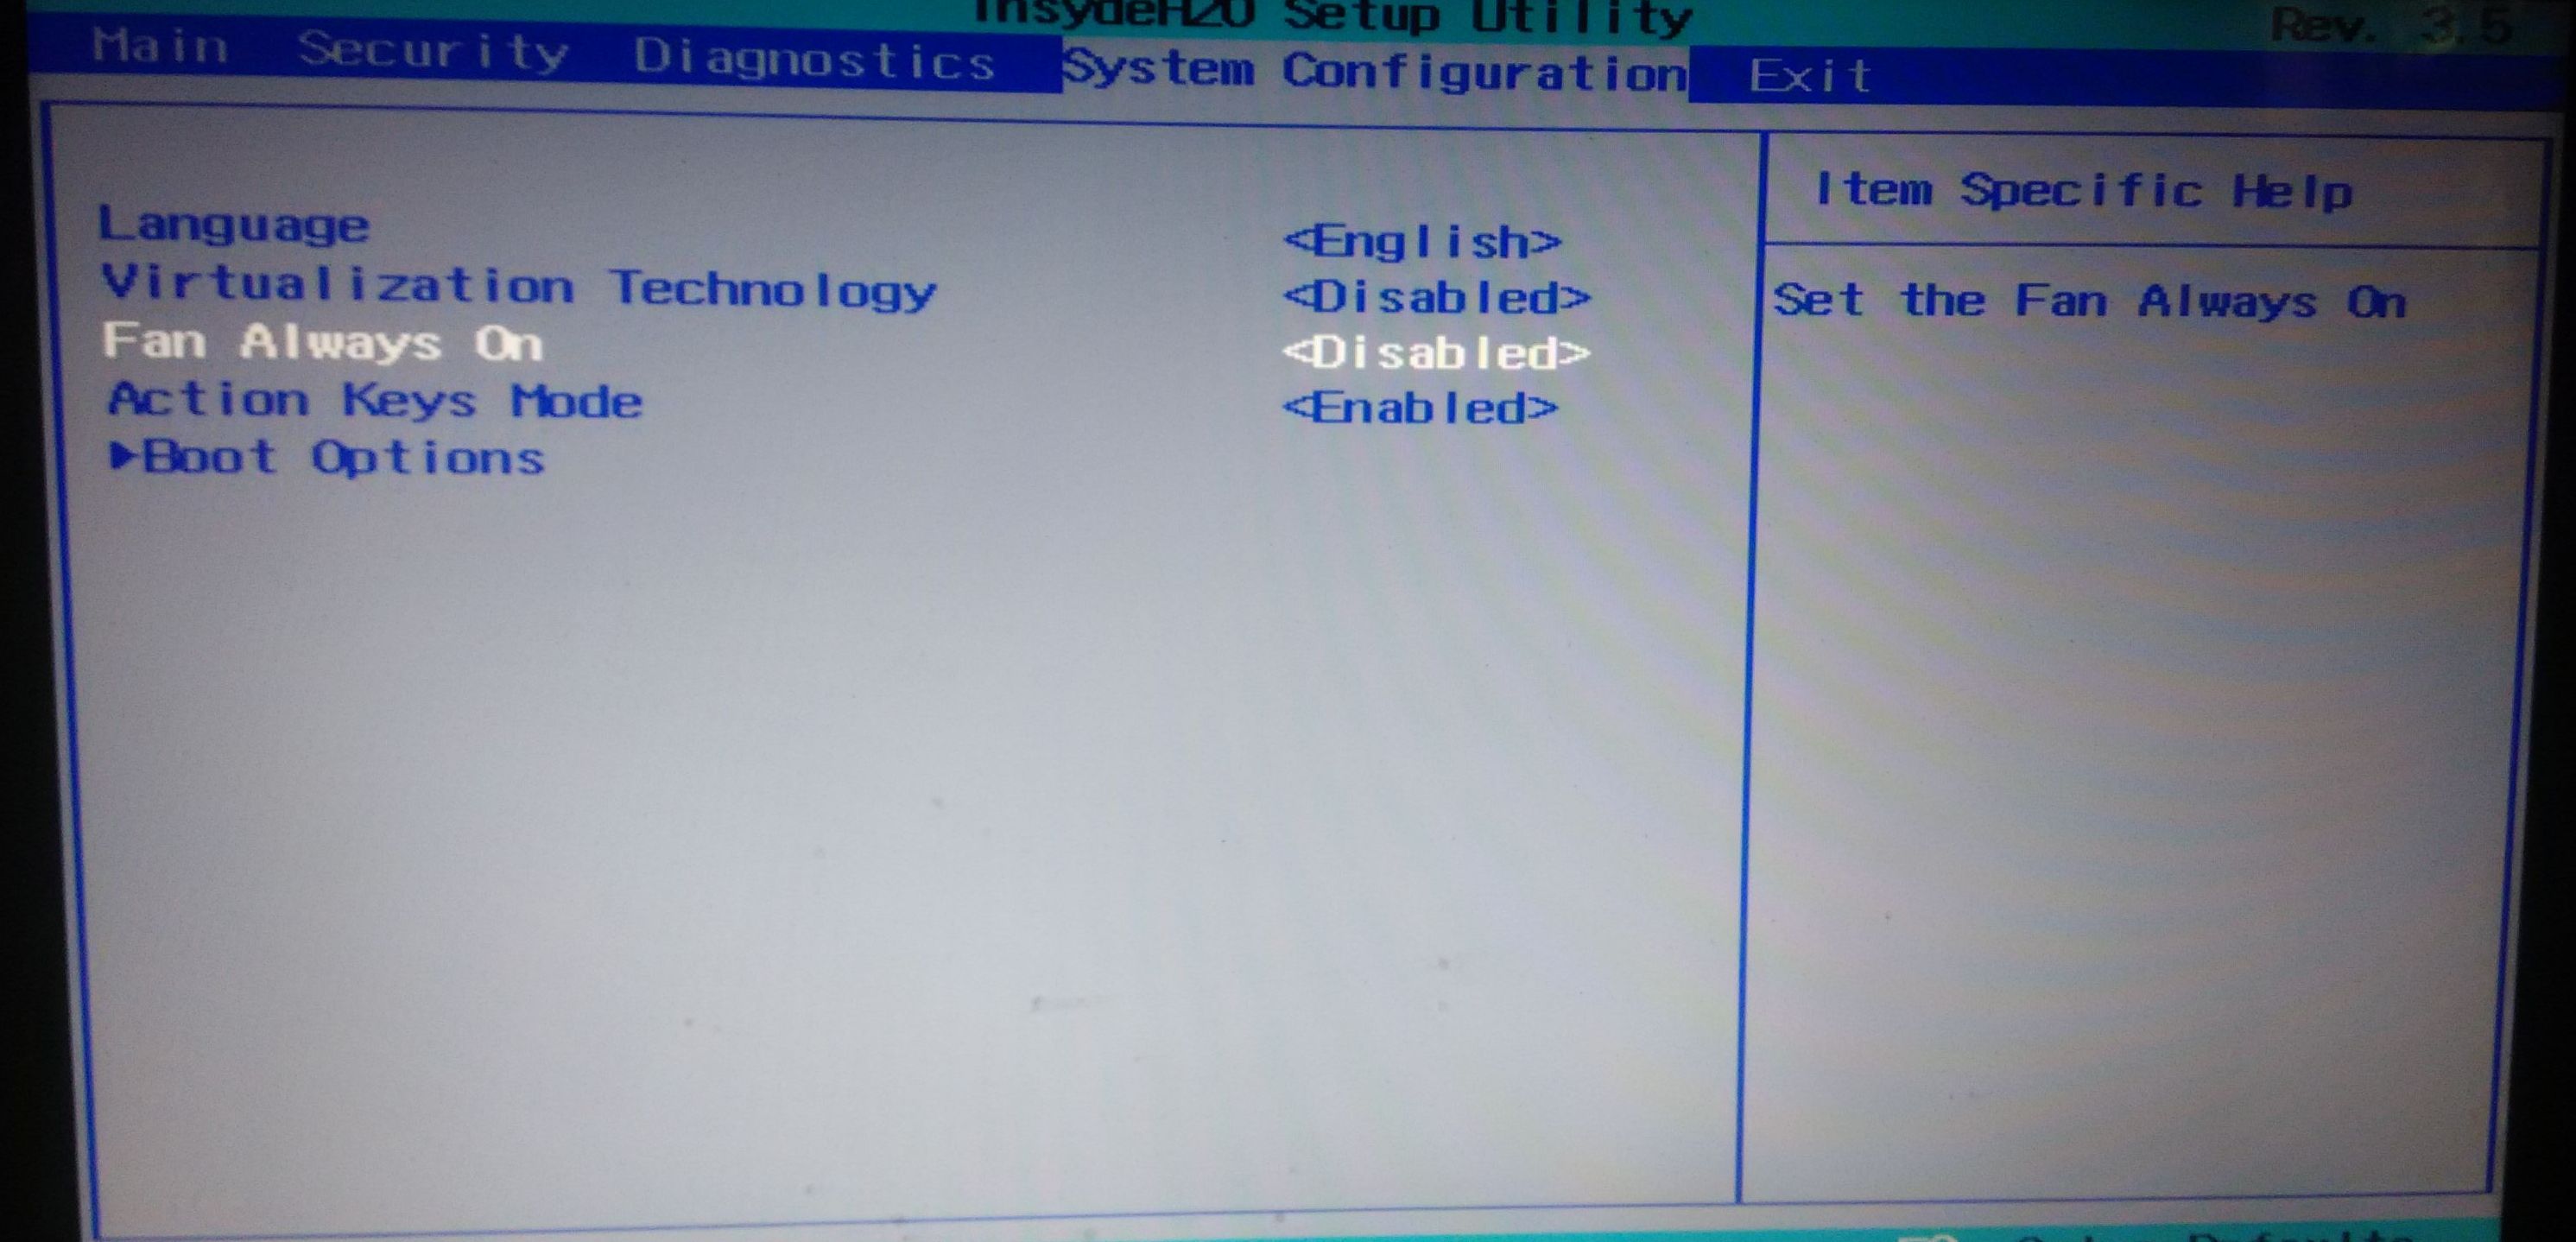
In most of the cases (hp laptops mainly), by default in the BIOS settings, the laptop fan is instructed to be always on. That’s the reason the fan keeps running unnecessarily even in the winters where there are no chances of overheating. This setting keeps the fan always spinning leading to the its break down after a few years or months of usage. So try disabling “FAN always On” from the BIOS. To disable the settings:
• Power off your laptop, and switch it on by pressing the ESC button on the keyboard. (or the required key)
• Now enter the BIOS settings by pressing the appropriate function key displayed on the screen.
• Soon when you enter the BIOS goto “System Configuration” where you will find “Fan Always On” option just simply <disable> it, now save the settings and reboot the system.
Updating your BIOS
The Basic Input Output System (BIOS) is the first program that runs each time when we boot our laptops. It is not stored on the hard disk but rather its stored on the motherboard’s storage instead. Updating the BIOS is always a good choice when the system meets hardware problems. There are 2 ways to update the BIOS, one is using a window’s based application and letting the software do the update for you and the other one is using a bootable device to perform the job. It is always recommended to use the bootable method for updating your BIOS if available.
Clean Your Laptop
Cleaning a desktop PC is very easy, just open up the cabinet and wipe off the dust using a cloth or other cleaning equipment like a boss, but when it comes to cleaning a laptop things start getting a little tricky. If you don’t want to open up your laptop, then you can use compressed air duster can to blow air into your laptop’s fan area letting the dust come out. You can purchase laptop fan cleaning kit from amazon. The dual pack of compressed air duster would cost you around $15-16 only. You can also blow air when the laptop fan is running to make the excessive dust come out all together at once.
Clean your laptop fan from inside

Even still if your laptop is making noise after cleaning your laptop externally, then its time to enter the world of hardware my friend. Its not that complicated as it looks, the only requirement is getting the appropriate tools for the task and there you go. The tool I use for disassembly looks like in the image known as jackly 32 in 1 interchangeable magnetic screw driver, and when it comes to the price point, you would not have to worry much because it is one of the cheapest toolkit that you can find online. You can find lots of disassembly laptop videos on YouTube for your specific laptop model that you can watch as a backup. So to reach the laptop fan follow the steps carefully:

• Open up the whole back panel of your laptop by unscrewing all the little screws removing the Hard Drive, RAM & the Wireless Adaptor from the back and the keyboard present up front. (Make sure that you detach the track pad flat wire carefully before removing the keyboard). If this is your first time then as I said before, you can prefer watching the disassembly video of your laptop on YouTube (if available) so that you can be more confident about what you are doing.
• When everything is removed you can now use brushes or soft cloth to gently wipe off all the dusts present on the motherboard’s visible surface.
Note: to make sure that your screws doesn’t get lost, you can always use a magnet to stick all of them together.
• Usually the laptop fan is present behind the motherboard, attached straight to the heat sink with the processor. So unscrew the motherboard completely, be gentle with the display and power socket wires before pulling off your motherboard. The parts marked in the image below are those areas which commonly everyone forgets to remove before pulling the motherboard off.

• Now turn it around and clean up the fan. You can unscrew the fan too for cleaning its blades, but the screws of the fan’s cover is too small so be careful with that to avoid the risk of losing it.
• Now rewind back everything up, place all the components back to its position again and switch it on after when done.
Note: If your laptop’s display is not switching on, then make sure that you inserted the RAM correctly in the slot.
Replace your laptop Fan
If Cleaning the fan doesn’t fix your problem then, the final option that you are left with is replacing the fan itself and unfortunately in my case I had to replace my fan to tackle the issue. The electromagnetic motor which keeps the fan running is the culprit resulting to the noise which is to be replaced. You can browse through varieties of laptop fans on Amazon and buy the one that suits your laptop’s exact model. Just follow the above step again, and replace your fan with the new one you purchased. Also apply the thermal paste between the heat sink to the exact area shown in the image down below. Thermal paste helps to reduce the overheating of the processor drastically, usually the thermal paste is included with the new laptop fan that you order or purchase from the market. Now after replacing my old fan with the new one, my laptop is as quiet as a ninja.

Hope the following method helped you for fixing your laptop noise or if you want to share your thoughts or any suggestions, without a second thought drop your comments down below.